Author : Pankaj Singh Holariya, Senior Engineer – CloudDevOps
Original Published Date: May 31, 2023
Are you looking to simplify the deployment process of microservices architecture in Google Kubernetes Engine (GKE) while maintaining greater control over your architecture? Look no further, as this tutorial will guide you through deploying microservices to GKE using Helm and Cloud Build.
In the realm of microservice deployments on GKE, Helm and Cloud Build emerge as the dynamic duo, providing the tools and processes needed to orchestrate your architecture with ease.
Prerequisites
Before we begin, you should have a basic understanding of Kubernetes, Helm, and GCP. You will need to have the following tools installed and configured:
- Google Cloud SDK
- Docker
- Helm
You should also have access to a GCP project with the following services enabled:
- GKE
- Cloud Build
- Container Registry
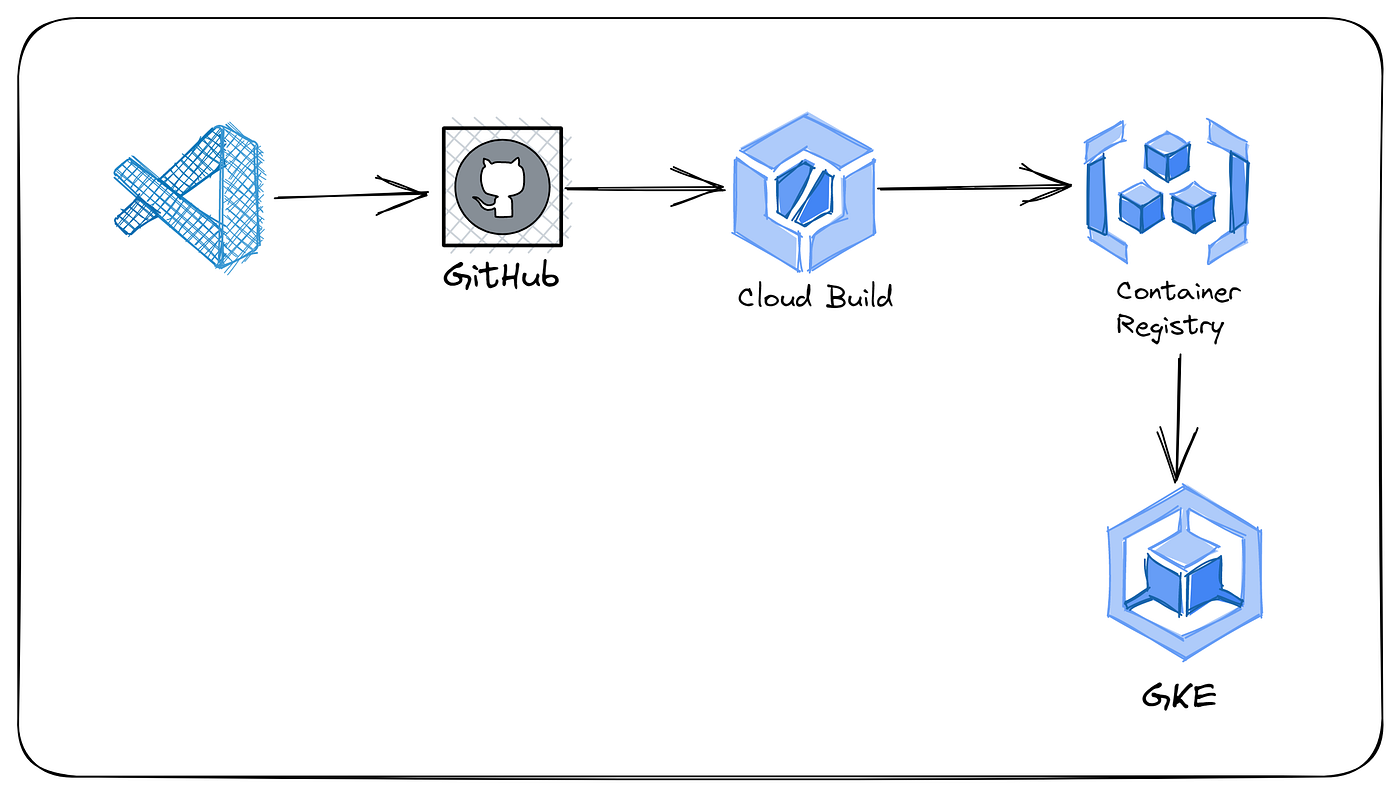
Pipeline Diagram:
Setting up the Project
We will start by creating a new GCP project and enabling the required services. Follow the steps below to set up the project:
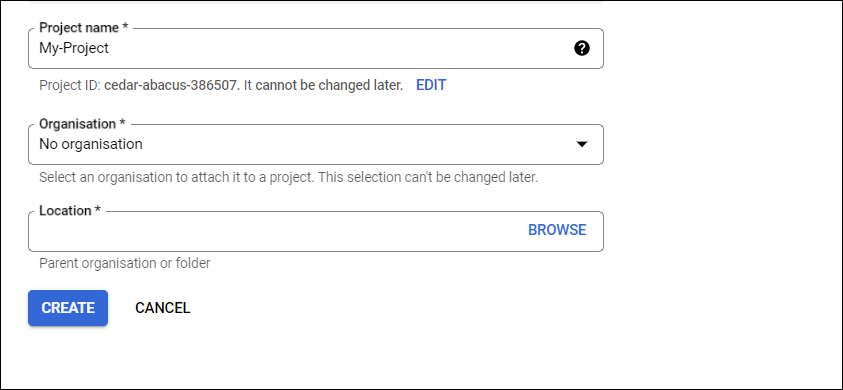
- Open the GCP Console and create a new project.
2. Enable the following services:
a. Kubernetes Engine API
b. Cloud Build API
c. Container Registry API
d. loud Source Repositories API
Below are the steps for enabling above services.
- Go to the Google Cloud Console and select your project.

- In the navigation menu, go to APIs & Services > Dashboard.

- Click on “+ ENABLE APIS AND SERVICES”.

- In the search bar, type “Kubernetes Engine API” and select it from the list of available APIs.
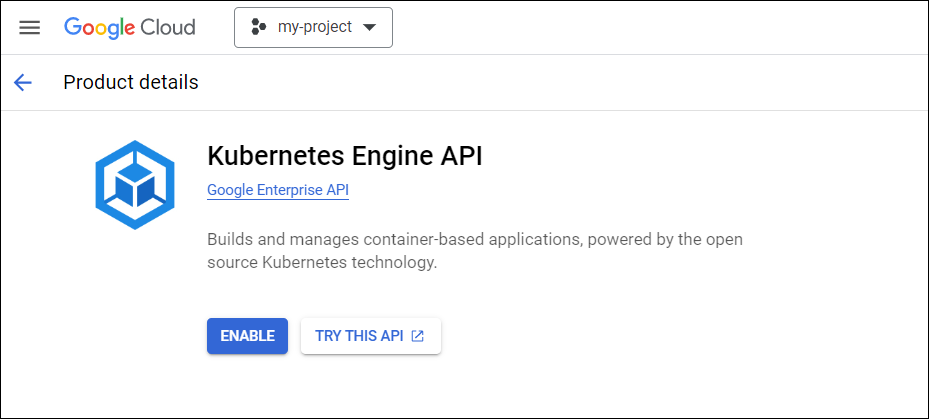
- Click the “ENABLE” button.
- Repeat steps for Cloud Build API, Container Registry API, and Cloud Source Repositories API, respectively.
3. Create a new GKE cluster with default settings.
To create a new GKE cluster with default settings, follow these steps:
- Go to the Google Cloud Console and select your project.
- In the navigation menu, go to Kubernetes Engine > Clusters.
- Click the “+ CREATE CLUSTER” button.
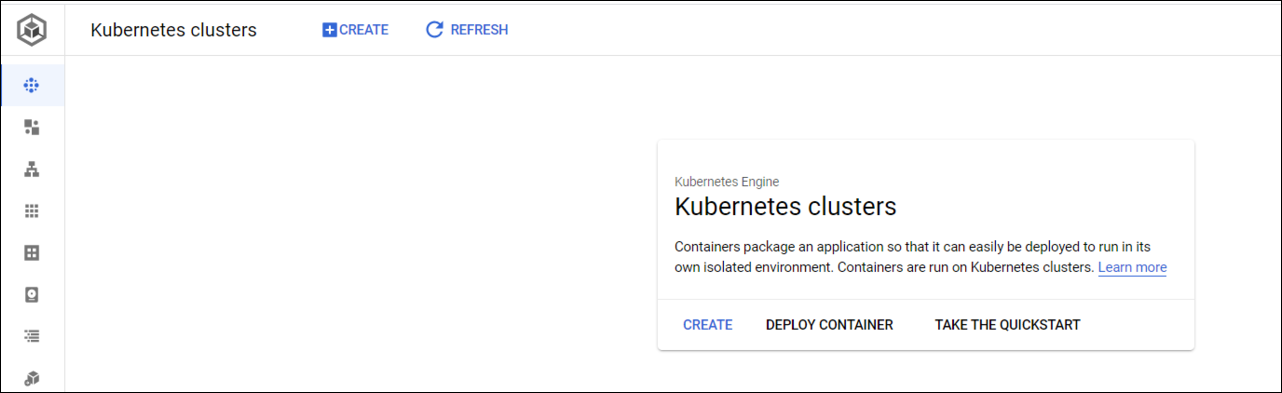
- In the “Create a cluster” dialog, enter a name for your new cluster.

- Leave the default settings for the cluster size, node pool settings, and other advanced options.
- Click the “CREATE” button to create your new cluster.
4. Create a new GitHub repository to store your microservice code.
Creating the Microservice
We will create a simple Java microservice that exposes a REST API endpoint. Follow the steps below to create the microservice:
1. Create a new Spring Boot project using the Spring initializr.
2. Add the following dependencies to the pom.xml file:
<dependency>
    <groupId>org.springframework.boot</groupId>
    <artifactId>spring-boot-starter-web</artifactId>
</dependency>
<dependency>
    <groupId>org.springframework.boot</groupId>
    <artifactId>spring-boot-starter-actuator</artifactId>
</dependency>
3. Create a new HelloController class with the following code:
@RestController
public class HelloController {

    @GetMapping("/")
    public String sayHello() {
        return "Hello, World!";
    }
}
4. Build and run the microservice using the following command:
$ mvn spring-boot:runYou should be able to access the microservice at http://localhost:8080.
5. Create a Dockerfile in your microservice project directory with the following contents:
FROM openjdk:8-jdk-alpine
ADD target/my-microservice.jar my-microservice.jar
ENTRYPOINT ["java", "-jar", "/my-microservice.jar"]
Creating the Helm Chart
We will use Helm to package the microservice code into a deployable artifact called a chart. Follow the steps below to create the Helm chart:
1. Create a new Helm chart for the microservice using the following command:
$ helm chart create my-microservice2. Replace the contents of the values.yaml file with the following:
image:
  repository: gcr.io/your-project-id/my-microservice
  tag: latest
  pullPolicy: Always

service:
  name: my-microservice
  type: ClusterIP
  port: 8080

ingress:
  enabled: false
The values.yaml file contains the configuration values for the chart.
3. Create a new templates directory in the chart directory.
4. Create a new deployment.yaml file in the templates directory with the following contents:
apiVersion: apps/v1
kind: Deployment
metadata:
  name: {{ .Chart.Name }}
  labels:
    app: {{ .Chart.Name }}
spec:
  replicas: 1
  selector:
    matchLabels:
      app: {{ .Chart.Name }}
  template:
    metadata:
      labels:
        app: {{ .Chart.Name }}
    spec:
      containers:
        - name: {{ .Chart.Name }}
          image: {{ .Values.image.repository }}:{{ .Values.image.tag }}
          imagePullPolicy: {{ .Values.image.pullPolicy }}
          ports:
            - name: http
              containerPort: {{ .Values.service.port }}
          readinessProbe:
            httpGet:
              path: /actuator/health
              port: http
          livenessProbe:
            httpGet:
              path: /actuator/health
              port: http
The deployment.yaml file describes the Kubernetes deployment that will run the microservice.
5. Create a new service.yaml file in the templates directory with the following contents:
apiVersion: v1
kind: Service
metadata:
  name: {{ .Chart.Name }}
  labels:
    app: {{ .Chart.Name }}
spec:
  type: {{ .Values.service.type }}
  ports:
    - name: http
      port: {{ .Values.service.port }}
      targetPort: http
  selector:
    app: {{ .Chart.Name }}
6. Commit the Helm chart to your GitHub repository.
Setting up Cloud Build
We will use Cloud Build to build and deploy the microservice to GKE. Follow the steps below to set up Cloud Build:
1. Create a new cloudbuild.yaml file in the root of your GitHub repository with the following contents:
# cloudbuild.yaml

steps:
  # Clone the repository
  - name: 'gcr.io/cloud-builders/git'
    args: ['clone', 'https://github.com/username/repo.git']
    dir: 'workspace'

  # Step to build the Java JAR file
  - name: 'gcr.io/cloud-builders/mvn'
    args: ['clean', 'install']
    dir: 'workspace/my-microservice'

  # Check code quality with Checkstyle
  - name: 'gcr.io/cloud-builders/mvn'
    args: ['checkstyle:checkstyle']
    dir: 'workspace/my-microservice'

  # Build the Docker image of the microservice
  - name: 'gcr.io/cloud-builders/docker'
    args: ['build', '-t', 'gcr.io/$PROJECT_ID/my-microservice:$COMMIT_SHA', './workspace/my-microservice']

  # Push the Docker image to the container registry
  - name: 'gcr.io/cloud-builders/docker'
    args: ['push', 'gcr.io/$PROJECT_ID/my-microservice:$COMMIT_SHA']

  # Set up kubectl
  - name: gcr.io/cloud-builders/kubectl
    id: Configure kubectl
    args:
      - cluster-info
    env:
      - 'PROJECT=my-project'
      - 'CLOUDSDK_COMPUTE_REGION=us-central1-a'
      - 'CLOUDSDK_CONTAINER_CLUSTER=my-cluster'
      - KUBECONFIG=/workspace/.kube/config

  # Set up Helm and deploy the application
  - name: 'gcr.io/cloud-builders/helm'
    args:
      - 'upgrade'
      - '--install'
      - 'my-microservice'
      - './my-microservice-chart'
      - '--set=image.tag=$COMMIT_SHA'
      - '--namespace=my-namespace'
      - '--wait'
    env:
      - 'HELM_HOME=/workspace'
      - 'KUBECONFIG=/workspace/.kube/config'
      - 'CLOUDSDK_COMPUTE_ZONE=us-central1-a'
      - 'CLOUDSDK_CONTAINER_CLUSTER=my-cluster'
The cloudbuild.yaml file describes the build steps for the microservice. In this configuration, Cloud Build performs the following steps:
Step 1: Build the microservice using Maven.
Step 2: Builds a Docker image and tags it with the $COMMIT_SHA value.
Step 3: Pushes the Docker image to Container Registry.
Step 4: Applies the Kubernetes service configuration
Step 5: Deploy the Helm chart with the image tag set to $SHORT_SHA.
Note that we’re using environment variables to pass project ID and commit SHA to the build steps.
2. Grant the Cloud Build service account the following roles:
a. Kubernetes Engine Developer
b. Storage Object Viewer
c. Cloud Build Service Account
To grant the Cloud Build service account the necessary roles, follow these steps:
- Go to the Google Cloud Console and select your project.
- In the navigation menu, go to IAM & Admin > IAM.

- Enter the email address of the Cloud Build service account: [PROJECT_NUMBER]@cloudbuild.gserviceaccount.com
- Note: Replace [PROJECT_NUMBER] with your project number.
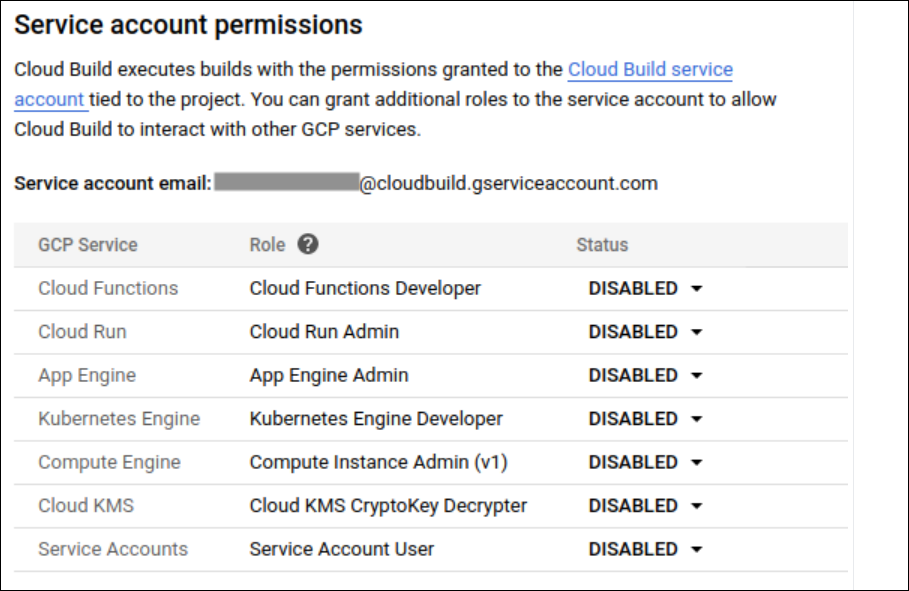
- Select “Kubernetes Engine Developer” and required “Role” and enable it.
3. Add a trigger to the Cloud Build configuration by following these steps:
- Go to the Cloud Build triggers page in the Cloud Console.
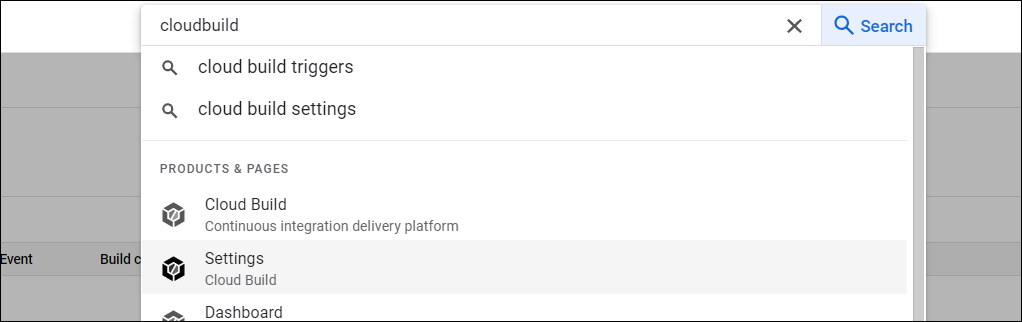
- Click “Create Trigger”.
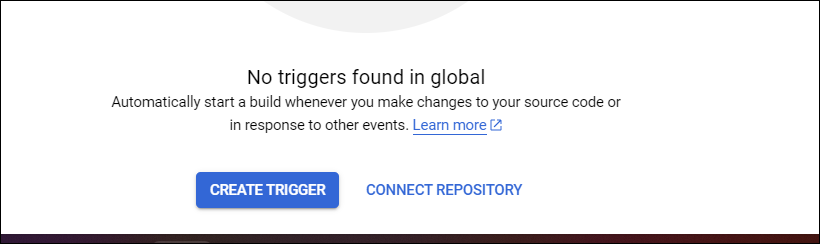
- Put the name of your cloud build pipeline.
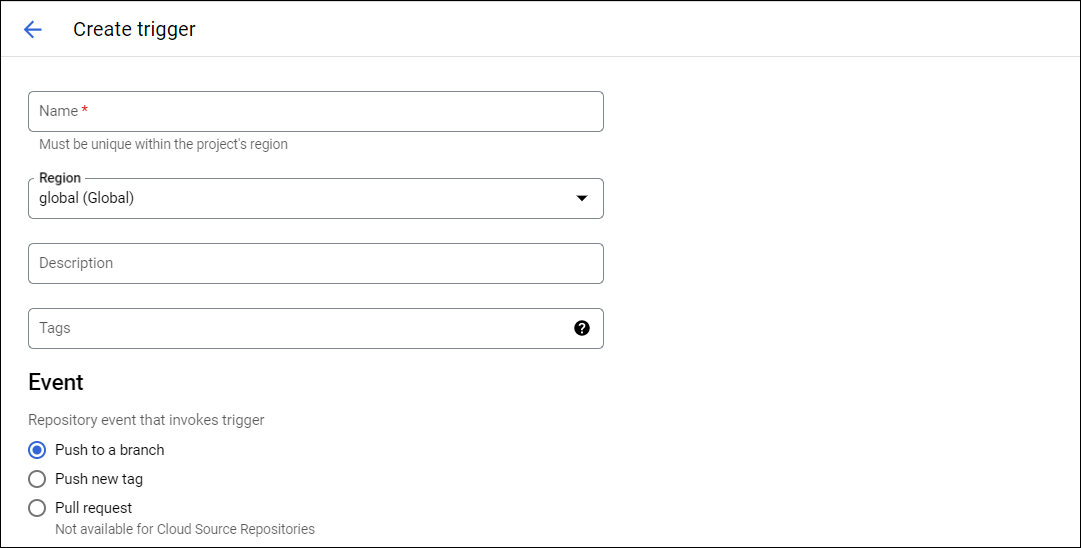
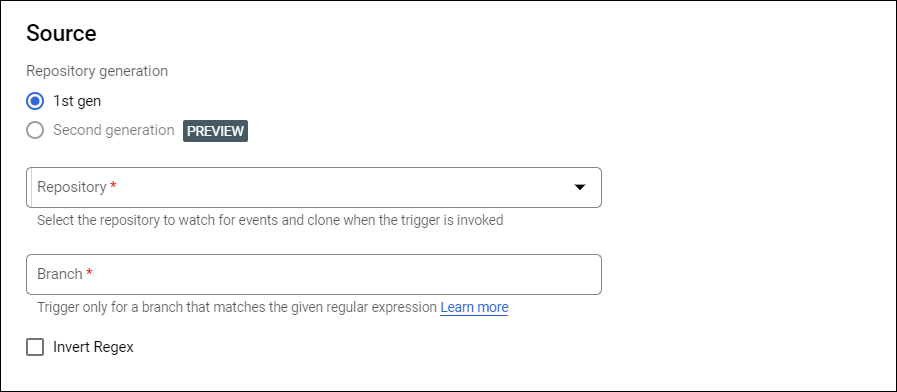
- Set the source to your GitHub repository and choose the branch to trigger on.
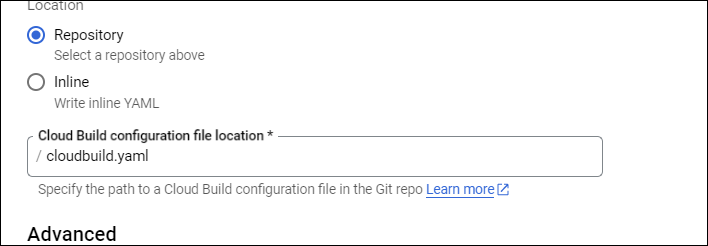
- Set the trigger type to “Cloud Build configuration file”.
- Set the configuration file location to
cloudbuild.yaml.
- Click “Create” to save the trigger.
With this trigger, Cloud Build will automatically build and deploy the microservice whenever changes are pushed to the specified branch.
Note that you can customize the trigger settings to suit your needs, such as specifying build substitutions, triggering builds on specific files or directories, and setting build timeouts and logging options.
In this blog, we have walked through the process of deploying a Java microservice to Google Kubernetes Engine (GKE) using Helm and Cloud Build. We started by creating a new GKE cluster, configuring Helm, and creating a Helm chart for the microservice. We then set up Cloud Build to automatically build and deploy the microservice to GKE whenever changes are pushed to the specified branch. By following these steps, you should be able to deploy your own Java microservices to GKE with ease.
Happy deploying! 🥰
Leave a Reply